
Putting together pieces of the 1957 Triumph Thunderbird frame for final metal finishing, Gouges, pitting, welding porosity and bad welds are being ground out and filled to get the frame smooth enough for chrome plating.

The rear frame mount boss needed a little love. Some welding and grinding to make for a tighter fit between the front and back frame.

This frame came with some signs of the rough life it has lived. This kickstand mount had been broken and repaired at some point. Since the repair was so gnarly and another side stand is being used, it needed to come off. Fortunately, the repair was brass brazed and could be melted off without too much trouble. I had been told the fixtures on these old Triumph frames were brass brazed on, but that didn’t seem likely, as the gaps are too tight to allow the brass to flow into them. When the remnants of the fixture were pried off, it appears that silver soldering is how they were originally applied.

That’s better. You can’t even tell where the old side stand mount was.

The rear of the lower triple clamp was modified to include the stops for the front fork. This had been done a while back, but needed some additional welding to fill in the surface. In this picture, the clamp is in the middle of being polished with black compound.

The handlebars and brake pedal got some more attention. The cable exits were finished out on the bars, and a bunch of contouring and shaping was done on the pedal.

Every inch of this frame will be gone over before it is done. Even with all that has been done, there is at least another day of refining needed. Every joint is being evaluated to fill any voids and then the welds ground smooth. Because the welds are being ground off so much, special care is being given to insure the welds are deep below the final surface.

An example of the kind of things getting repaired. Small pits and nicks get ground or drilled out, welded, and then ground and polished out. The foil tape on the neck tube is to protect the serial number stamp.
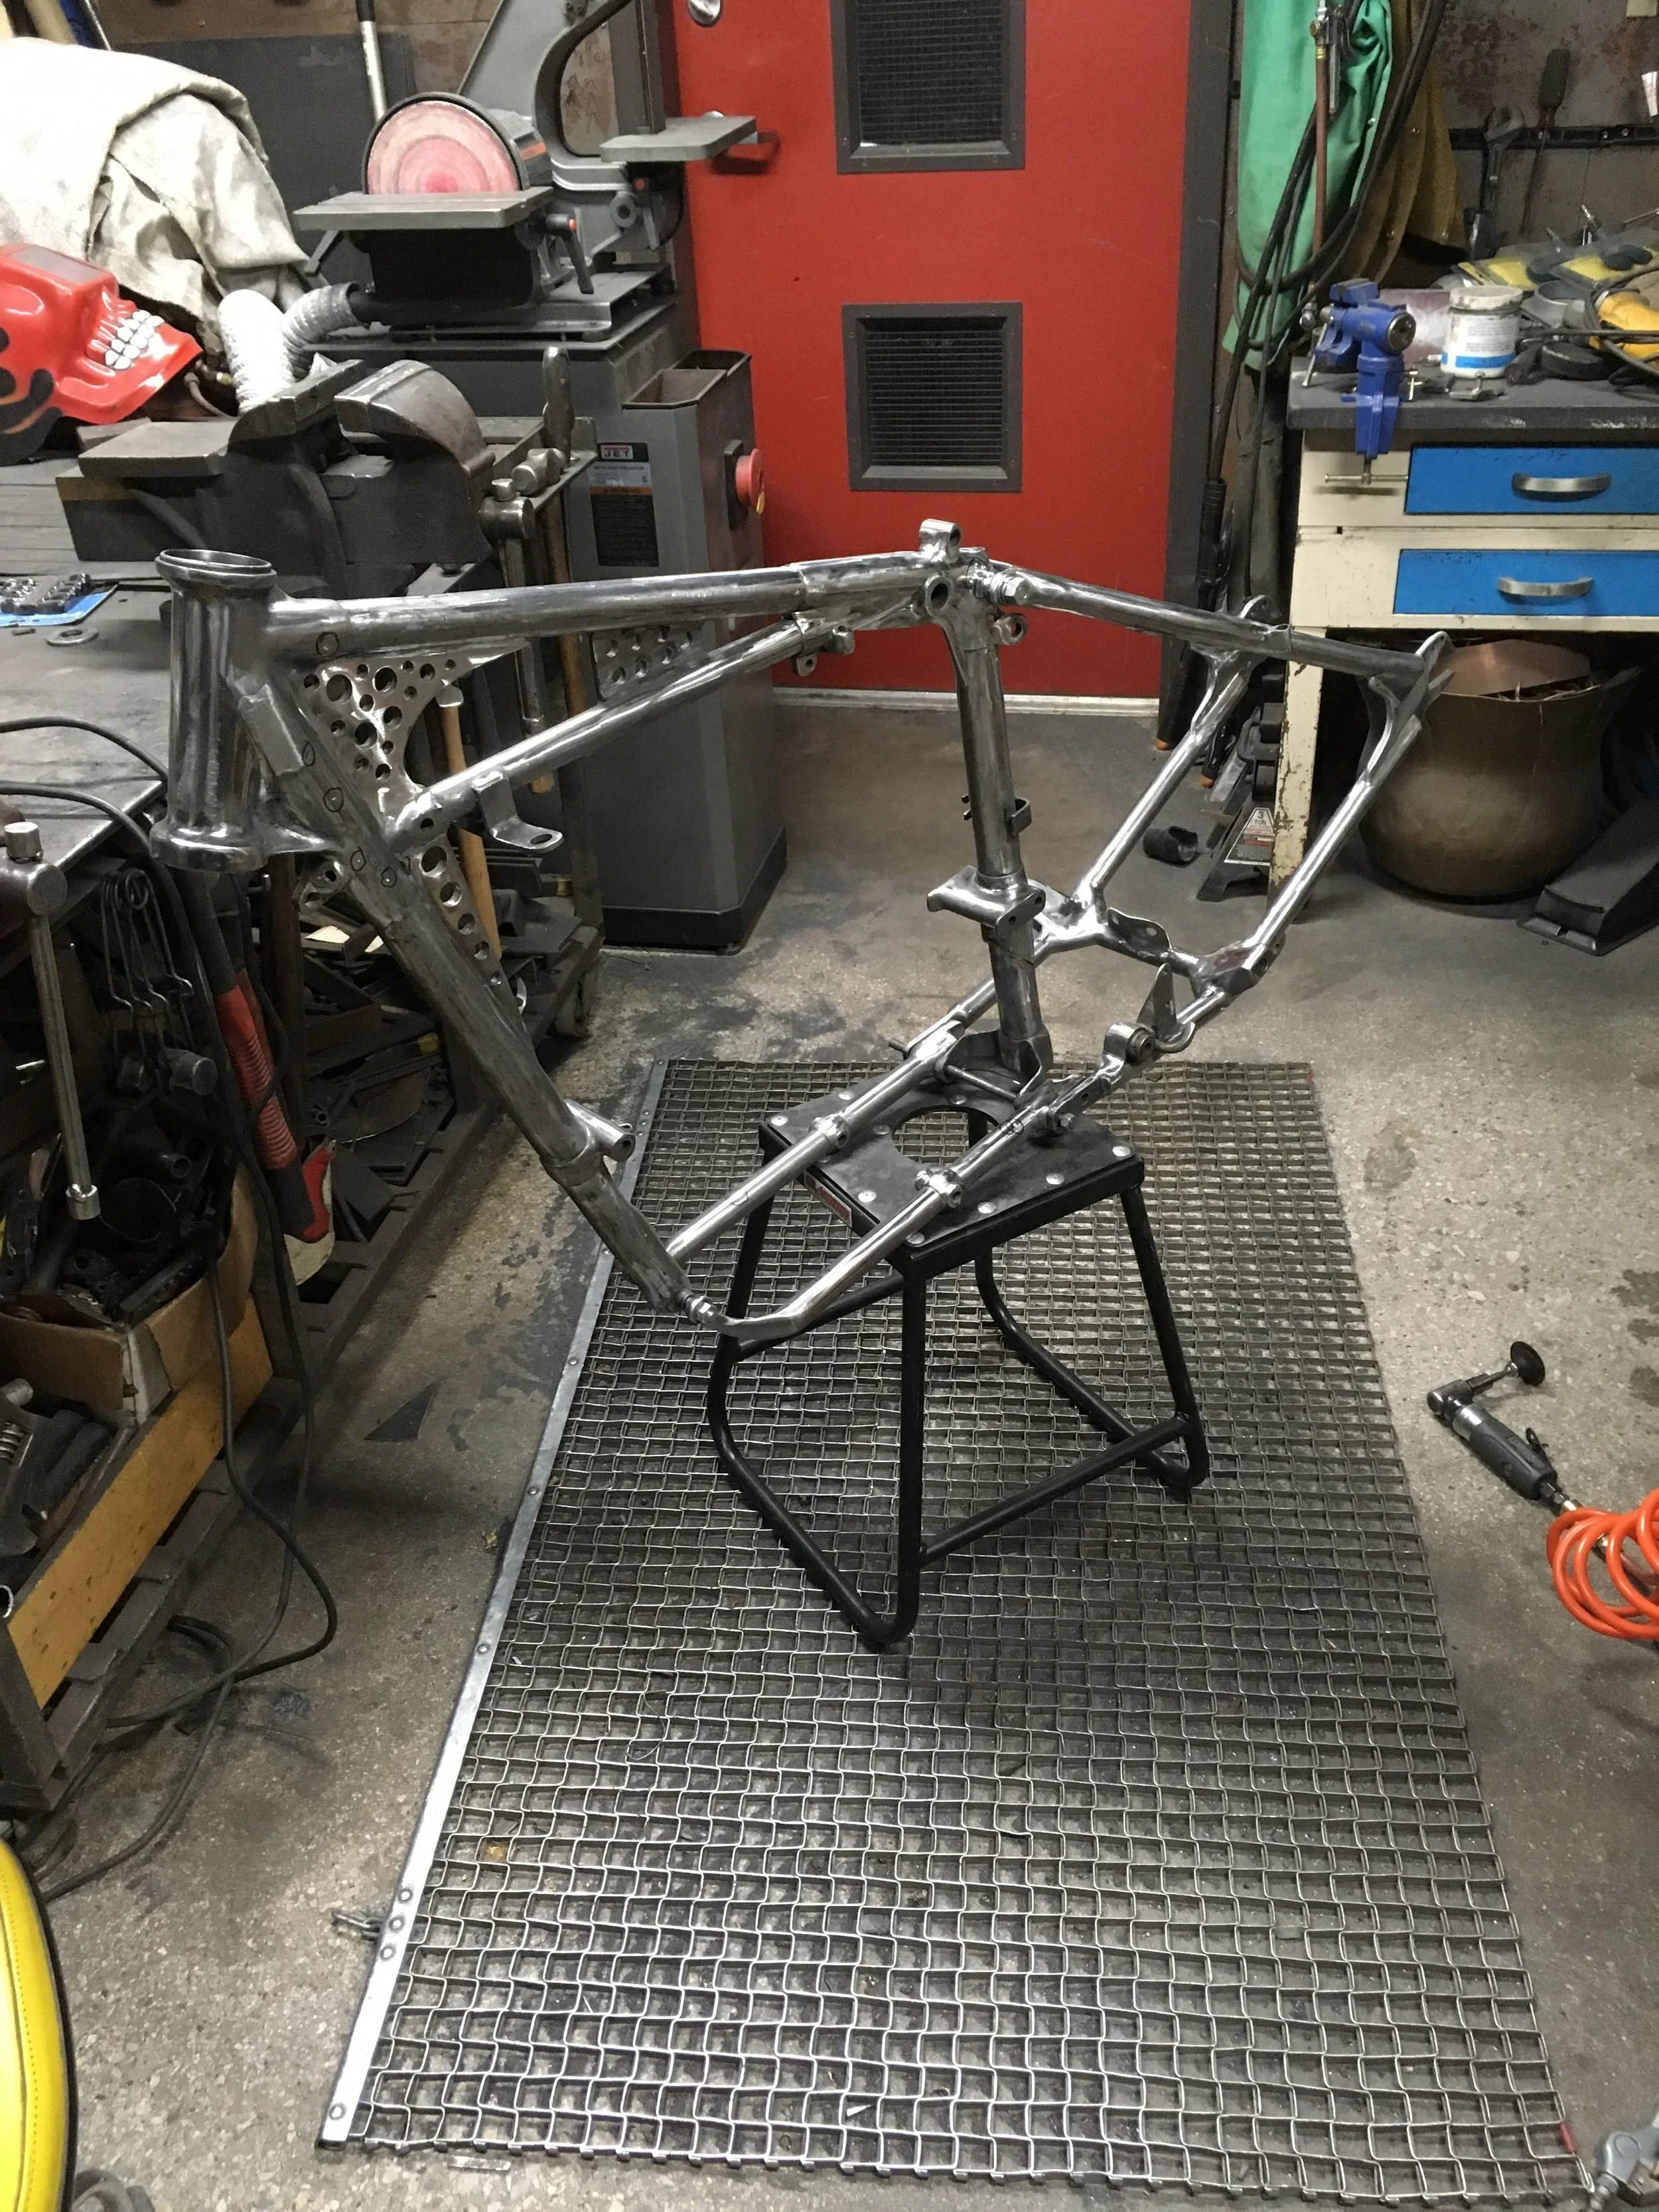
The difference between the first and last frame pictures in this post is not easy to see, but an entire day of finishing separates them.

The base of this side stand was sand cast and rough with some inclusions that had to be dug out and welded up .Some metal was also added to the wear surface of the bracket. After some welding and bending on the stand to get the bike leaned over a little more, everything was sanded and polished out.

One final thing: a hack on the special tool for removing the bearing retention ring on preunit wheels. Because grinders have been replaced so many times around here, there is a wealth of wrenches and one was tapped to make this tool. A slice was made down the middle to get the right spread. The posts fit in the holes perfectly, with a slight tap needed to set it in.